Timber Frame Restoration in Lac du Bonnet, Manitoba — Project Review

Scroll to read project review or click the image to watch instead.

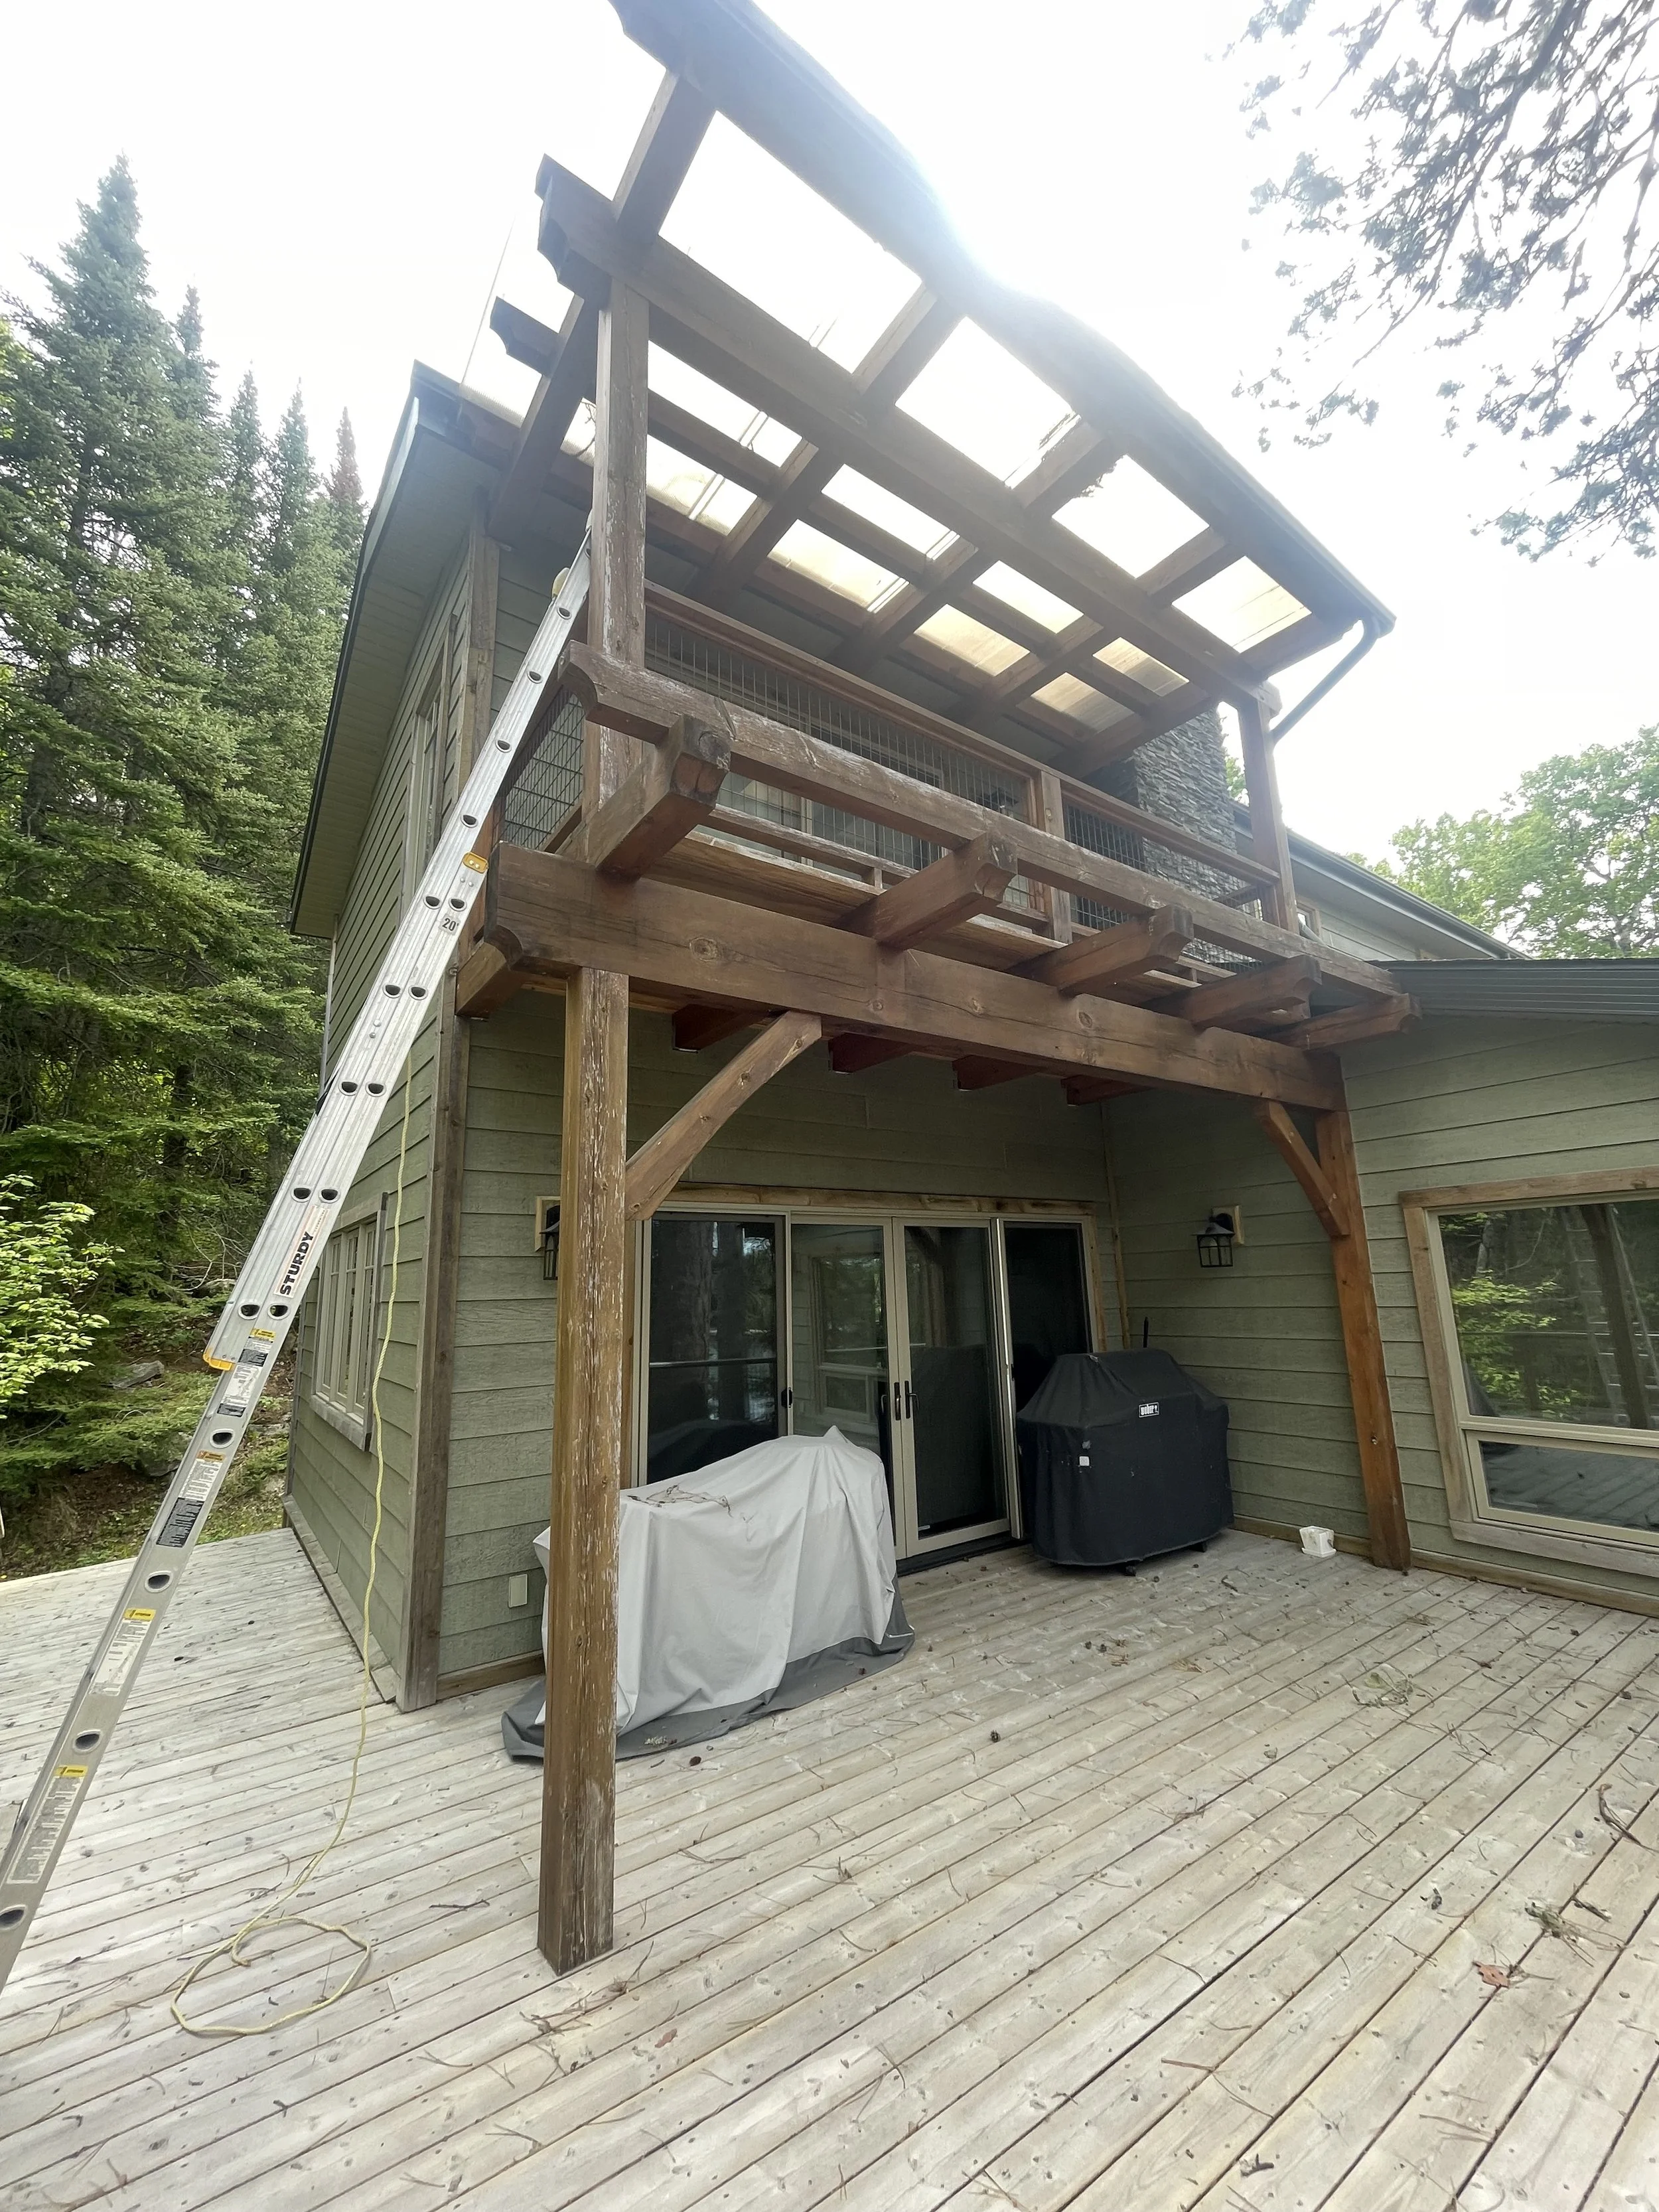
This post is a review of a recent timber frame restoration project we completed in Lac du Bonnet, Manitoba — a beautiful timber home right on the lake.

As a Manitoba company specializing in timber frame and log home maintenance, this project highlights many of the common issues we see with clear coats, UV exposure, and weathered wood.

Initial Condition: Clear Coat Without Stain

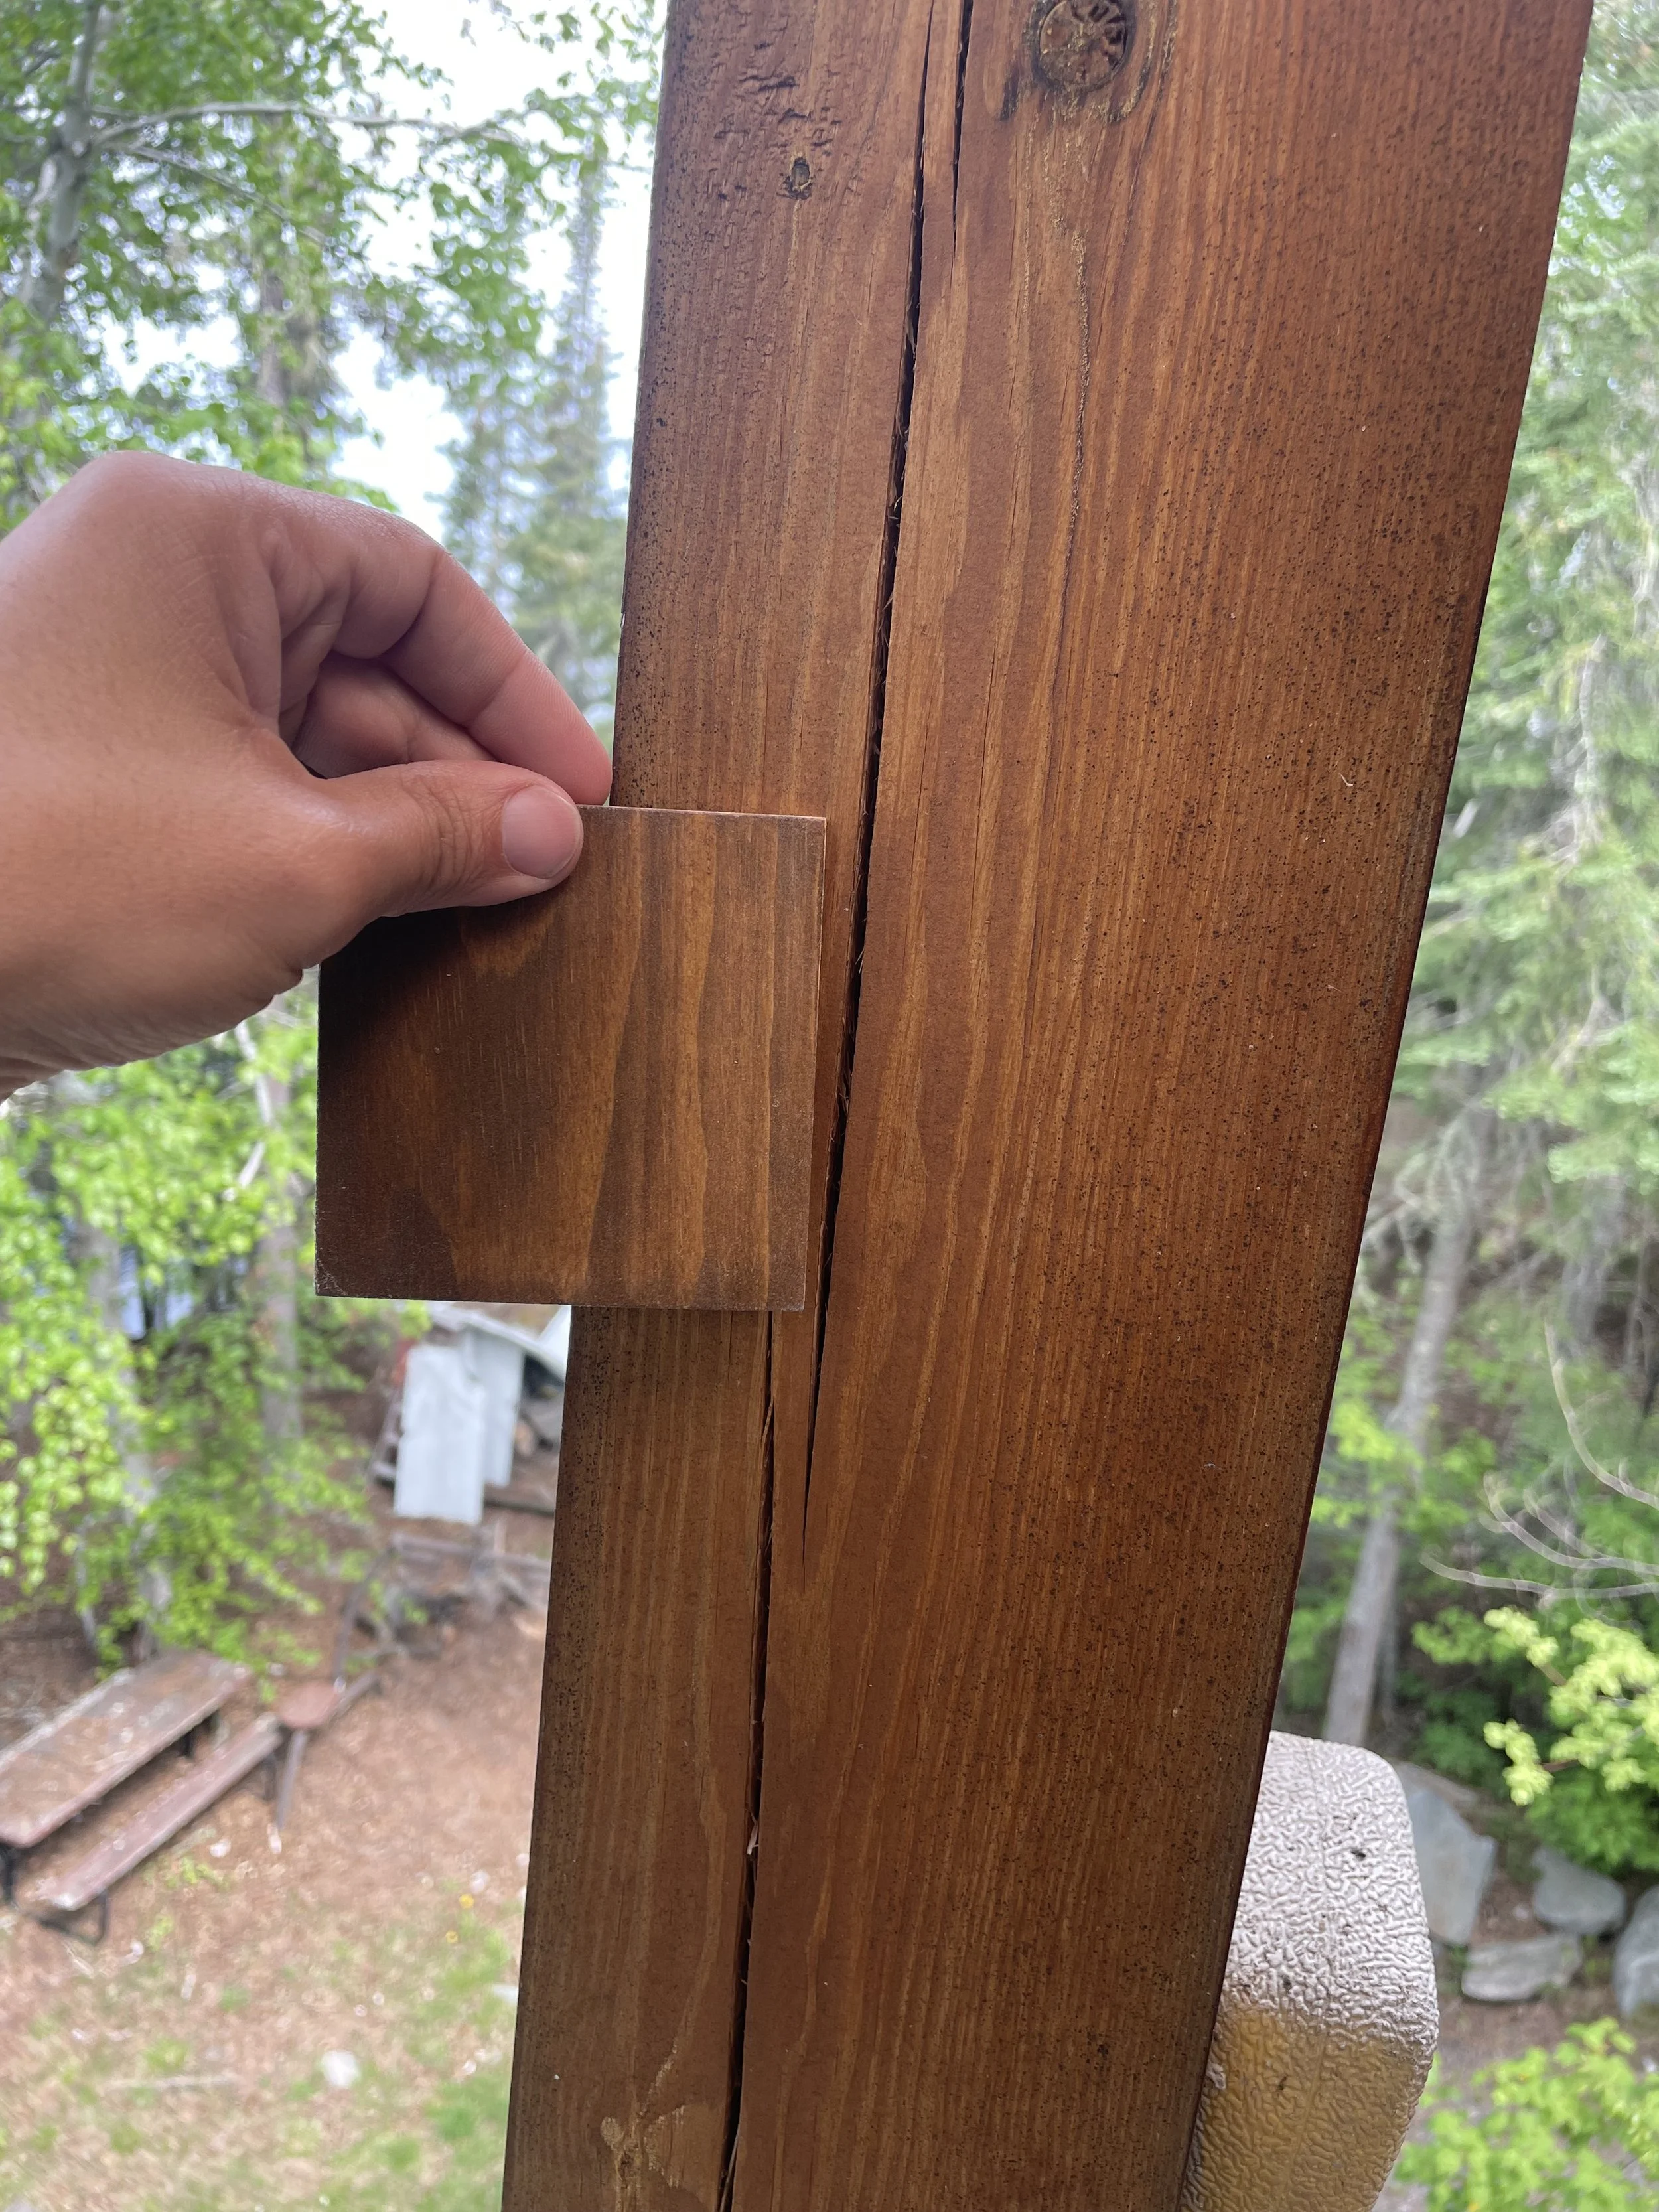
The situation here was that the timbers were originally finished with a tinted clear coat—but not a proper stain.

This resulted in:

  • Weathering beneath the clear coat

  • Grain discoloration

  • Areas where the clear coat deteriorated

  • Patchy, uneven tones throughout the timber

  • Blackened and greyed fascia and outward-facing beams

In many spots, the clear coat had failed, but in others it remained intact while the wood underneath aged and discoloured.

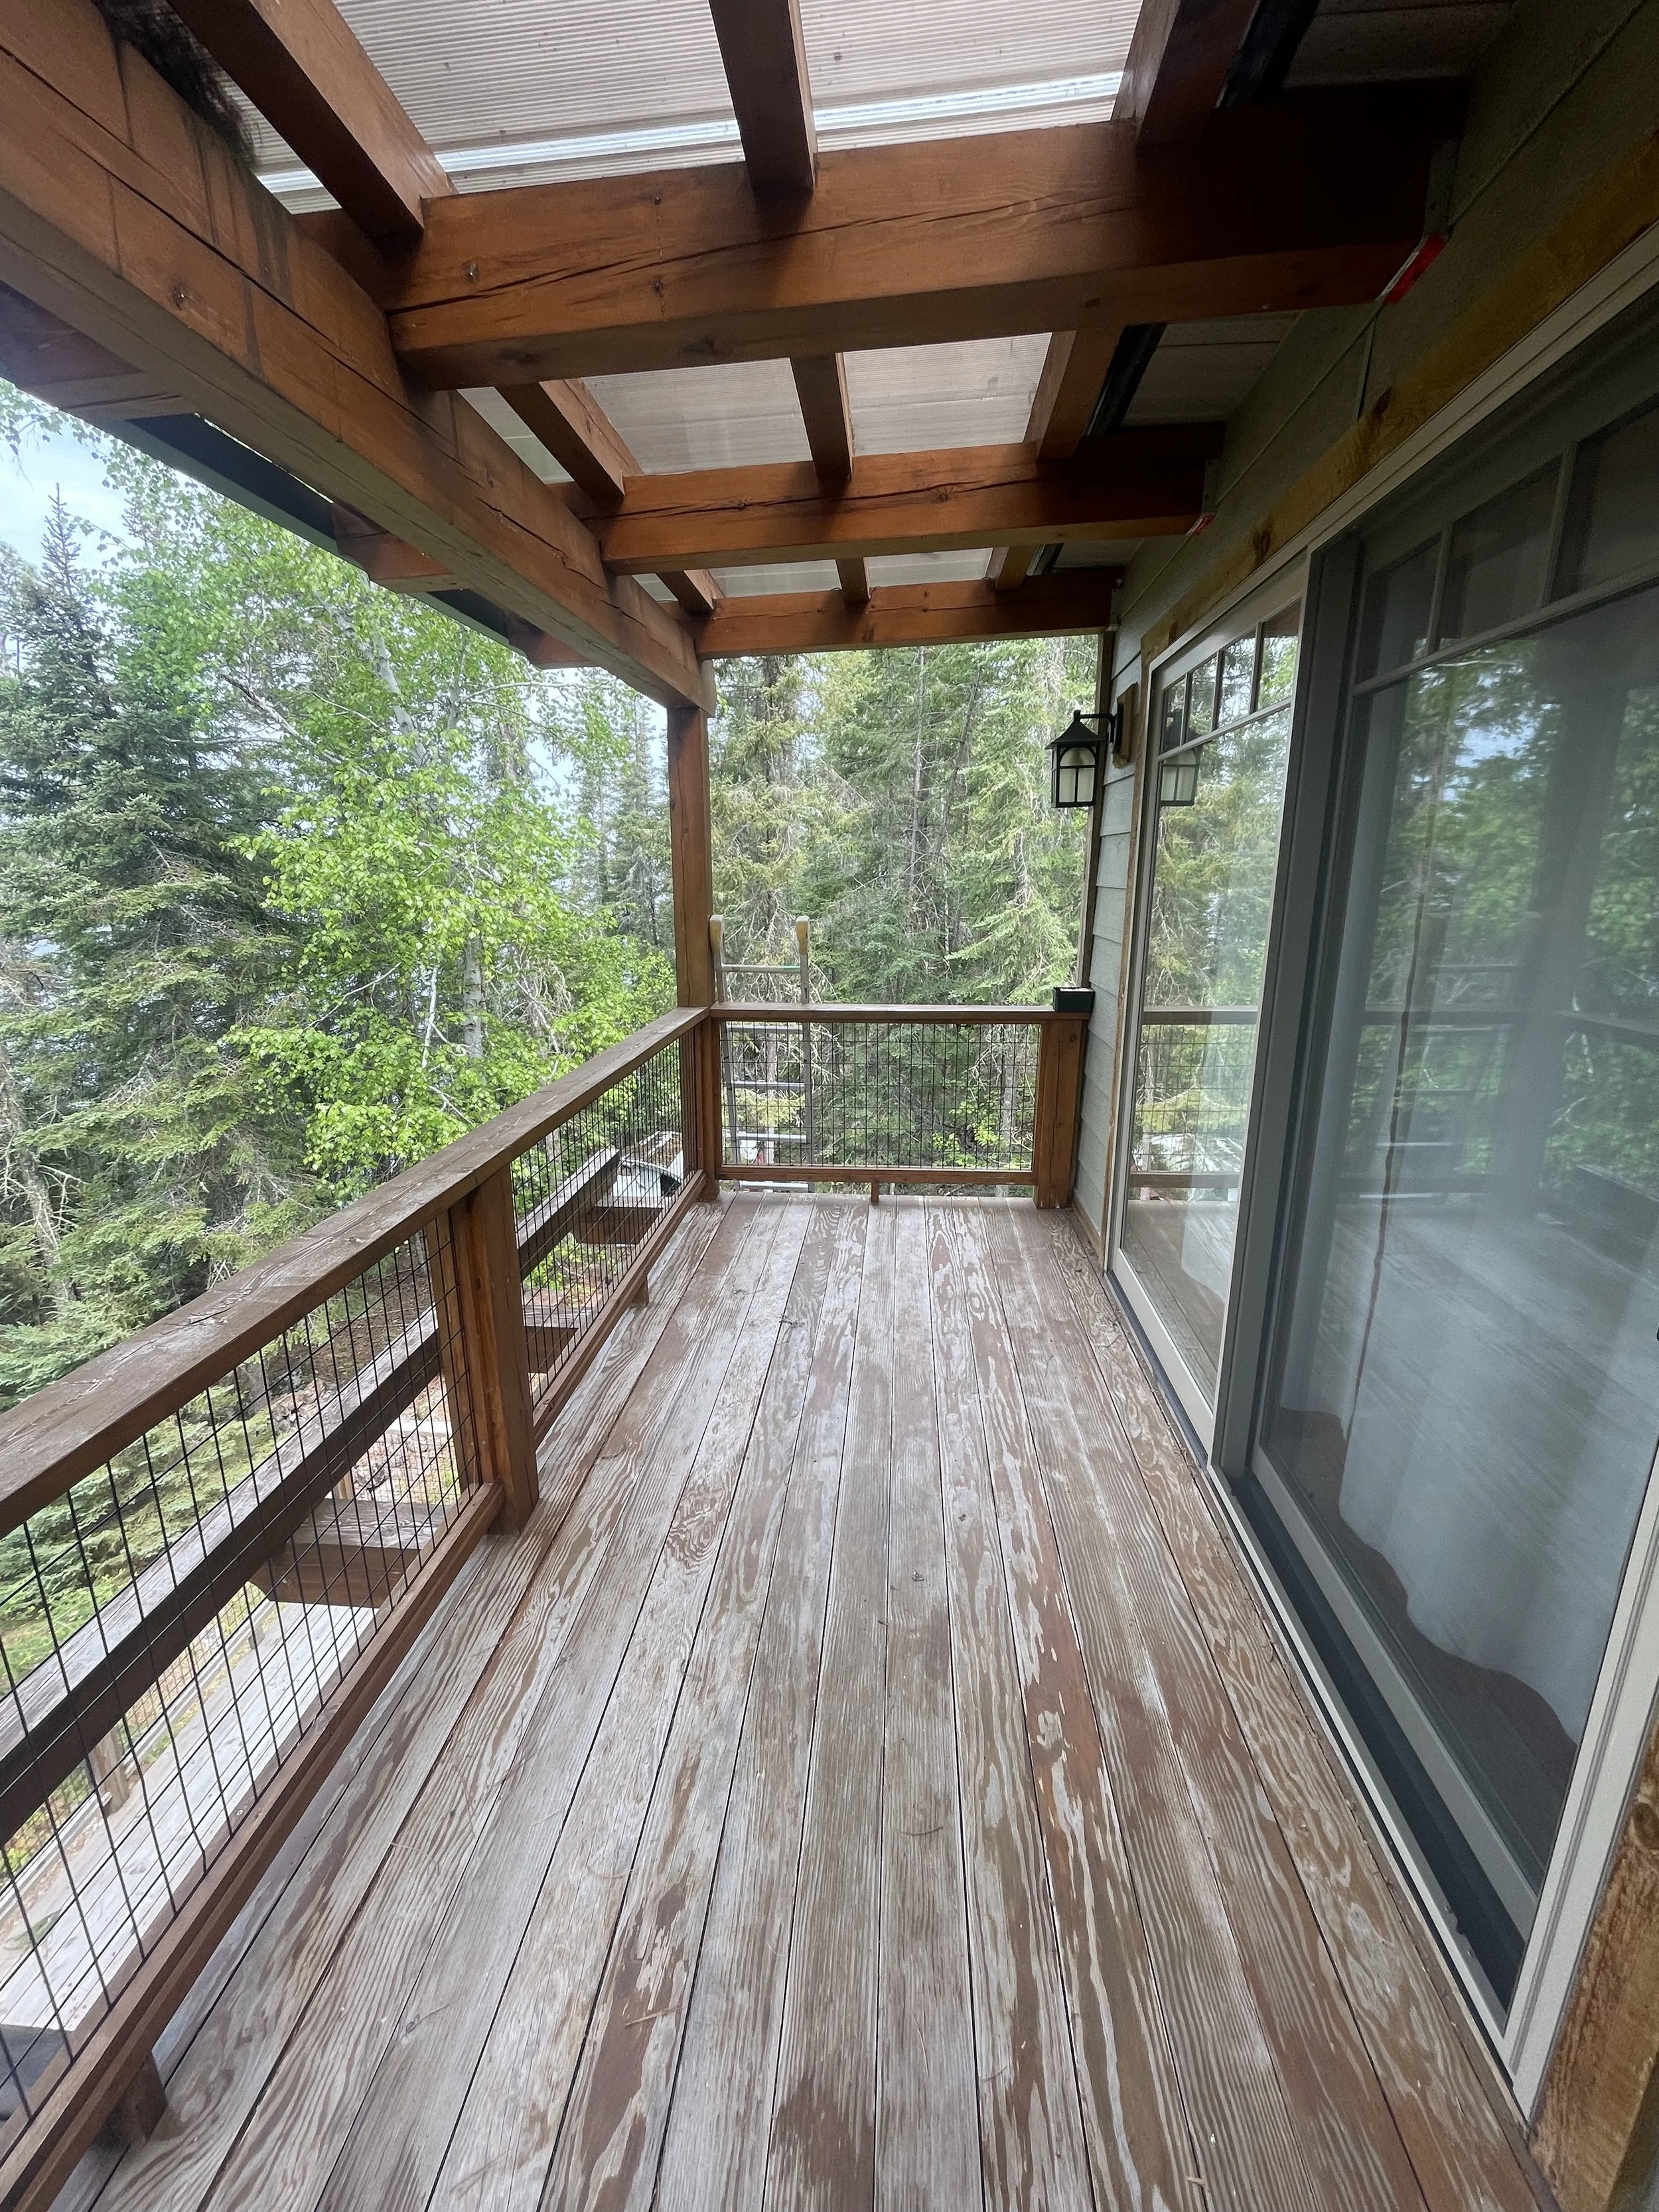
Visible Signs of Weathering

On the lakeside especially, the beams showed:

  • Random discoloration and dappling

  • Grey and black weathering

  • Darkened zones where UV damage went deeper into the wood

  • Areas where the clear coat stayed intact but the wood beneath aged unevenly

The driveway side had similar blackening and grain aging. Up close, the inconsistencies were even more visible.

Our Approach: Sanding, Blending, and Restoring

We began by sanding down the fronts and sides of the most exposed timbers to remove the damaged finish and access the raw wood.
Some lighter spots remained — this is normal, since certain parts of the grain weather deeper and can’t be eliminated entirely.

Timbers closer to the soffits didn’t need sanding because they hadn’t received the same level of sun exposure, so they were still in good condition.

The goal here wasn’t to make everything look brand new — that’s not realistic with natural wood.
Instead, we aimed to create a cohesive, naturally aged look that blends well and is easier to maintain long-term.

Scaffolding, Lifts, and Prep Work

We set up scaffolding and lifts to access the top peak and higher beams.
You can see the color shifting even in the early stages as the sanding and first coats of stain went on.

Lower timbers began receiving their first coats, helping them blend into the surrounding materials and soffits.

Again, you’ll see that stain takes darker in certain zones — especially around knots or deeper grain patterns. This is completely natural and tends to soften over a few weeks.

Sanding Results and Exposing Fresh Wood

As sanding progressed, we exposed clean wood underneath.
This raw wood still showed some natural grain artifacts — which can’t always be removed — but the drastic grey and black weathering was eliminated.

These variations are part of the character of timber frames, and once stained and sealed, they create a much more natural, cohesive appearance.

Applying Stain and Clear Coat

Once the sanding was complete, we applied:

  • A tinted stain to deepen and unify the tone

  • One or two coats of clear coat for protection

Important note:
Stain = UV protection (think sunscreen)
Clear coat = moisture barrier (think rain jacket)

Each has a different purpose, and both are essential for long-term timber maintenance.

Darker stain tones also help mask future weathering while adding additional UV resistance.

Final Results: A Cohesive, Protected Timber Frame

The final look brought everything together:

  • A more uniform tone across all timbers

  • Front-facing beams restored to a natural, rich appearance

  • Aging artifacts minimized

  • Clear protection added for longevity

  • A finish that’s 80–90% back to how it would have looked when new

It won’t ever look brand-new again — that’s simply the nature of wood — but the transformation was significant.

The home now has a finish that is easier to maintain and far more resistant to future sun and weather exposure.

Project Recap

This project involved:

  • Extensive sanding of sun-exposed timbers

  • Blending techniques to match existing protected wood

  • Application of stain for color and UV protection

  • Clear coat to seal and protect

  • Scaffolding, lifts, and multi-angle access work

  • A full restoration of the timber frame’s natural beauty

It was a big transformation and a fun project to work on.

Interior Repaint & Stipple Removal Project – Before & After

Scroll to read project review or click the image to watch instead.

Project Overview

The work took place throughout the main area of the home, including the entrance, landing, living room, and hallway. The homeowners were looking for a brighter, lighter look and wanted to refresh the space from its original builder beige and stippled ceilings.

Preparing the Workspace

We began by prepping the entire area:

  • Poly was placed over furniture and cabinets

  • Drop sheets were laid over all the flooring

  • Walls and ceilings were covered and protected before stipple removal began

Prep is essential here because stipple removal creates a significant amount of dust and debris.

Stipple Removal Process

Using water (applied by sprayer) and putty knives, we scraped off all the stipple from the ceilings. Once removed, the ceiling becomes much smoother and cleaner.

After scraping, we inspected the ceiling for any issues. In many stipple removal jobs, hidden imperfections show up once the texture is gone. That was the case here.

Drywall Repairs & Patching

Once the stipple was removed, we uncovered:

  • A crack in the original drywall

  • Additional small patching areas throughout the ceiling

This is common because ceilings originally intended for stipple often aren’t taped or finished to the same standard as smooth ceilings. We applied tape and mud where needed and repaired damaged areas.

Priming & Painting the Ceilings

With repairs complete, the ceilings received:

  1. One full coat of primer

  2. Two coats of finish paint

This created a clean, bright, and smooth ceiling throughout the home.

Painting the Walls

Next, we moved on to the walls, completing patching and applying two coats of the new colour. The clients were aiming for a lighter, whiter tone to open up the space and modernize the look.

Before & After Transformation

The difference between the original builder beige with stipple and the updated smooth ceilings with lighter walls is dramatic.

The new colour palette:

  • Adds brightness

  • Provides a modern contrast between the ceiling and walls

  • Makes the space feel larger and more open

What to Expect With Stipple Removal

One important note: stipple removal is messy. Even with full prep, it creates dust, and some of it can track into other areas, including the driveway. It’s totally normal, and we always make sure to sweep and clean up. But dust will continue to settle over the next few days after completion, so some ongoing cleanup is required.

Final Thoughts

Overall, it was a straightforward but detailed project, with a few coordination points around patching and repairs. In the end, the homeowners were happy with the transformation—and the new, brighter look made a huge difference throughout the home.

Timber Frame Refinishing - Near Lake of the Woods | Before & After Transformation

Timber Frame Restoration Project – Kenora Area

Today I’m reviewing a timber frame restoration project we completed in the Kenora / Lake of the Woods area, where we frequently work on timber frame homes, log homes, and exterior wood maintenance.

Project Overview

This project involved restoring a beautiful timber frame structure. The beams were in solid structural condition with no rot, but they showed significant weathering from Lake of the Woods climate conditions. The stain on the deck boards had also worn away over time.

Our goal with this project—and with most of our timber frame refinishing work in Northwestern Ontario—is to revive the wood’s natural beauty while ensuring long-lasting protection.

Choosing the Right Stain for Timber Frames

We began by selecting a stain that coordinated with the existing tones of the timber. While one side matched the sample closely, other beams varied slightly. This is common in timber frame and log home restoration, where natural wood colours differ from piece to piece.

Rather than trying to match every face perfectly, we focus on finding a stain colour that provides the most cohesive overall appearance. This approach results in:

  • A more uniform final look

  • Better long-term maintenance

  • Easier color matching for future touch-ups

This is the stain sample we ultimately selected for the project.

Surface Preparation & Sanding

Proper preparation is essential in any log home or timber frame maintenance project. We completed extensive sanding where the old finish had failed, and performed lighter sanding in areas that were still intact, mainly to remove:

  • Cobwebs

  • Dirt

  • Environmental buildup common around Lake of the Woods

Once everything was cleaned and prepped, we moved on to staining and clear coating.

Staining & Clear Coating Process

After applying stain to all exposed wood, we finished the project with two coats of clear:

First Coat

  • A clear coat with a small amount of stain mixed in

  • This adds warmth and depth to the wood

Second Coat

Adjusted based on beam colour:

  • Lighter timbers received slightly more tint for consistency

  • Darker or rich-looking beams received an untinted clear coat to avoid over-darkening

This customized approach ensures each timber blends beautifully while preserving its natural character.

Before & After Results

The transformation was significant. After removing the worn finish and applying our stain and protective topcoats:

  • The grain became more visible

  • The tone brightened and warmed

  • The wood looked healthier, richer, and more vibrant

This is a common result for our timber frame restoration projects in Kenora and Lake of the Woods, where sun exposure and moisture tend to fade the original finish over time.

Key Takeaway

Every timber frame or log home is unique, and so is each restoration project. It’s not always about finding the perfect colour match—it’s about choosing the most cohesive colour overall.

An Interview with our Founder (and Dad!)

BP Founders, Allen and Sharon Broesky

BP Founders, Allen and Sharon Broesky

Last week we took the time to interview our Dad and the founder of Broesky Painting and chat with him about his nearly 45 years of painting. This has been an important item on our list of to-dos because, while we spend so much of our time looking ahead and planning for the future of BP, we know it’s also incredibly valuable to look back at where we’ve been and what we’ve overcome. 

In true Allen Broesky form, we did this interview while walking all around Steinbach (check out our social media post from a few weeks ago to see just how much our Dad loves walking) and, also in true Allen Broesky form, Dad started us off strong without even needing an intro question.

I was going to start off this conversation by saying that it almost seems, when I reflect back on my life, that I was born to paint. When I was about 14 or 15 years old, my dad asked me to paint our house. It was a two story house and I remember he built these ladder jacks and, of all the projects that my dad ever had me do on that yard, I still remember that as one of the most enjoyable. I loved that transformation. After I had the old house all scraped down and looking kind of tatty, we started transforming it. And, honestly, I was kind of sad when the project was over. I would have liked to repaint the house again. Of course, that's something my parents only did once every 10 years.

So that was kind of my initiation into painting. The other part of it all is that when I was younger I did a lot of drawing, colouring and painting. That was something I always enjoyed doing. So it was just natural for me to gravitate toward that kind of work.

So you started painting right out of school?

Oh no, it actually took a while for the whole thing to develop. In my mid 20s I was looking for work and one day I got invited over for supper by a friend of the family. Throughout the whole meal this guy was in a hurry to gobble down his food and go back to work. “Oh, you must be busy at the garage”, I said, as he was a mechanic. He replied, “I actually moonlight as a painter in the evenings.” This peaked my interest and before long I was walking over to C.T. Loewens where I was introduced to a man by the name of Dan Bekarias. I told Dan that I was needing work and he offered me a job priming some RTM’s. And just like that I was hired. This was in 1974.

After about a month of working for Dan, he came to me one day and said, “Al, it's pretty obvious that you can paint and I think you could do well in this business. Why don't you go to Red River Community College?” Now, at this point I really wasn’t sure if I was going to do this for a living, but I figured, okay, I’ll try it out. There wasn’t a lot of painting work in the winter in those days anyway. So off I went to Red River. Here again I was encouraged by my painting instructor who assured me that he thought I was cut out for this business. 

So this is when you started the company?

IMG_5144.jpg

Well, no, not immediately. After graduating from RRCC I spent some time doing other things. I got married, went to Bible school, spent 4 months in Haiti doing mission work and kept busy with some odd jobs. Then, in the winter of 1978, I decided that I needed to chart my life course. What was it that I wanted to do for the long term? What did I enjoy? While thinking about this, I realized that, of all the jobs I had done, painting was definitely the one thing that I enjoyed the most. That decided it. I started running ads in the Carillon News and people started calling.

What were those first few years like?

Well, I was working together with a good friend of mine, Norman Dueck, and we started doing a lot of exterior buildings at that time. We were busy. We were painting houses and barns. A lot of exterior stuff. There were still, in those days, a lot of homes that had wooden shingles on the roof. And so we would actually climb up there and remove all the moss and dirt and leaves, refurbishing those shingles and making them look very good. Those first couple years went well and we were quite busy. But then we had a bad recession early in the 1980s and that kind of set things back. However, once we got through that tough time, things just started taking off and I guess more and more people started hearing about Allen Broesky Painting. Inquiries started picking up and we got bigger and bigger contracts. With the bigger contracts, I couldn't keep up. I needed help and so I began to hire people. 

And where did it go from there?

Well, for years, the business did well. There were, of course, some years that were better than others. That's the nature of the construction business. But it was a fairly consistent way for me to provide an income for my family. And then, starting around the year 2000, we had this huge building explosion here in Steinbach. It was completely unprecedented, something I had never envisioned could happen. That boom, I realized, was the opportunity I'd been waiting for. I buckled down and I really went out and built my business. They say that in a construction world no matter how busy you are there's always room for one more project, but for me I often decided that there was room for two or three more. That's kind of how I worked for 10 years. It was very exhausting at times but that's kind of what drove me, compelled me to keep going forward. Looking back, I don't know if it was healthy all the time as it also meant that my wife Sharon had to make sacrifices because of how hard I was working and how much I was gone. Working 12-14 hour days was not unusual. Around that time, Matthew and Kevin were growing up. They joined the business and that was really good. I was able to work with them on a daily basis for many years. Working with your sons is such a rewarding experience. Very cool! God has been so good to me. Through painting, He has allowed me to pay every bill that ever came in the mail and to always put food on the table. I was able to get out of debt and I've gone on numerous vacations in many different places with my family. What a blessing it has been.

What do you like most about painting?

IMG_5761.jpg

I have always enjoyed many things about painting. I like creating a new look - that transformation is so rewarding. I am also very grateful for the chances to visit and explore many different towns and communities. One of my favourite places to work has always been cottage country in Manitoba and Ontario. 

I also enjoy learning about new products and becoming acquainted with and new tools arriving on the market. I remember buying my first paint sprayer. It was one of the worst pieces of equipment that I ever purchased. It just gave me nothing but grief and aggravation. For some reason I just kept trying to make it work. Finally, a day came when I lost my temper and I decided this is it. I don't need this piece of junk. And I clearly remember that phone call to Ken Heinrichs at E.G. Penners. I said, “What is the best sprayer Grayco has available?” Ken got out this catalog and gave me some details and I said, “Order it!”. It was a lot of money back then, but once that machine arrived, I was better equipped to do all kinds of projects which I hadn't been able to do previously, and I could do them more efficiently at that. It gave me the opportunity to do a lot more work and so it all turned out to be a blessing. 

What are some other advances in painting technology that you’ve seen throughout the years?

Latex instead of oil! What a difference that made! At the start everything was done with oil. I remember one of the first really substantial projects I picked up was a contract to paint the interiors of about 20 houses from October through to spring. They were all done with oil paint, of course, and we lived with those fumes for that entire winter. Oh man I don't know how we survived! I must have had a good constitution to live in that kind of toxic environment all that time. And then around the early 80s latex paint was starting to come around and to be promoted. I remember I did a job for a local contractor and he wanted me to use latex paint. Unfortunately, the formula of that particular brand had not been perfected and it was so bad. I remember painting with inferior watercolours when I was a kid and this initial experience with latex paint reminded me of those cheap watercolours. This paint had no hiding power whatsoever - you could paint a wall five times and still have no adequate coverage. And I figured, I guess I’m stuck with oil paint. Then along came another contract and that job required a specific type of latex paint. I remember it was a Pratt and Lambert paint and it was expensive! I mean it was, like, triple the cost of any other paint. I remember it all so clearly. This was an evening job and, having worked all day already, I was exhausted when I walked onto the site. I opened the paint can and started painting and thought, “Wow! This is good quality paint! Good coverage and none of the noxious odors of oil paint!”. And so by the mid to late 80s a lot of the established paint brands had come up with good latex formulated paint. From that point on, I remember, it became an almost daily thing to try and convince clients from the old school of oil paint to make the switch over to latex. To facilitate this transition I did some research on it and became educated on the differences in the molecular structure of oil paint and latex paint. In that research I discovered that latex paint was definitely far more conducive to our northern climates. The molecular structure of latex paint ensures that the paint expands and contracts with the different types of weather, whereas oil paint just is not able to do that. I sold quite a few projects by being able to share this knowledge and, of course, it was a whole lot more enjoyable doing my work because I finally was able to spend less time in those noxious conditions. 

04111739-C213-4EDC-AF6D-8B9029D84D84.JPG

Another improvement was in roller sleeves. The roller sleeves we had available to us would leave so much lint behind. Frequently we had to sand all the lint off and repaint, so the invention of lint-free sleeves was huge. The amount of time and energy this saved was unbelievable and the stress it removed from the daily execution of our work was invaluable.

Do you have a most memorable job that you could describe? 

Ha! Yes, I remember one that went really bad. It was mostly our fault. We were doing a veterinarian clinic that had a metal roof and we knew it had to be sandblasted. I thought we had a pretty good price on the job and I was expecting to do decently on the project. We rented a sandblaster from Wyatt Rentals in Winnipeg, picked it up and brought it to the job. So there we are sandblasting and sandblasting and, being inexperienced at it, we just can't believe how much sand we're using! The parking lot is full of it! There is sand everywhere. The paint is coming off very very reluctantly and we can’t figure out what in the world is going on. Well, we finally use up all the sand product we had purchased in Winnipeg and then we had to start phoning around locally. One of the local retailers had sand and we brought our used-up bag along. We showed them the sand we had been using and they didn’t carry it. They did, however, carry a different, more coarse type of sand. Well, we bought that product, brought it back to the site and started sandblasting. Wow! What a difference! I mean, that paint just peeled right off! We had been using the wrong product all along!. 

And how fun was it to clean up all that sand?

Oh, yeah. It was crazy! There was wind scattering it around everywhere! Man, if we had just done a little more research we could have avoided that whole thing. I think I ended up earning about $3/hour on that job! But after everything was said and done, we just had to laugh about it because it was so absurd. Thankfully, the vast majority of my projects went a lot better than this one did!

Have you noticed a difference in painting trends throughout the years?

Yes. Over the course of my career there have been many different painting trends, but the biggest difference I have experienced has been the change from semi-gloss paint to low-luster paint. People used to think that paint had to have a sheen to it in order for it to be good quality. But, let me tell you, low-luster paints are definitely a painter's best friend. There are a lot of walls, especially in repaints, that have all kinds of defects and bumps. Any shiny paint will always accentuate all those deficiencies while low-luster paints hide many sins. I was so glad to see an end to the trend of shiny walls and ceilings!

Any last thoughts or comments?

It's been a good ride. Painting has had many challenges and many rewards. I have a lot of people to thank over the years, a lot of people who have helped me get to where I am. I actually have a list of people I would like to acknowledge who impacted my life and helped me to be successful over the years.

First of all, my wife Sharon. Thank you for all the hours of behind-the-scenes work. My Dad, who was my spiritual mentor and who also assisted me in painting a project at one time. My dear late Mother. My two sons Matthew and Kevin. My brother Gerry Broesky. The late Dan Bekarias. My RRCC instructor Mr. Dermitt. Norm Dueck, Dennis Koop, the late Ray Rempel, Peter M Wiebe, Ken Heinrichs and all the wonderful staff at the E.G. Penners paint department over the years, the late Mr. Ernie Penner and Mr. A.K. Penner, Jim Penner (Penner Foods), the Banman family (Pacific Investments), the SCU, Roger Blanchard (Blanchard Construction), Larry and Jared Vogt (Vogt Building Construction), Ray Vogt, Barron Friesen, Bert Reimer, Wayne Bartell, Claude Desorcey, Wes Friesen, Bob Frey, Kleefeld Construction, Three Way Builders, Sentinel Homes and Golden West Radio. And to each valued customer and any painting associates not included in this list, thank you from the bottom of my heart.

IMG_5269-4.JPG